Showing posts with label preschooling. Show all posts

Friday, March 4, 2016

St. Patrick's Day Shamrock Cork Stamp


Why shamrocks? Why has this small, weedy plant become the face and main symbol of St. Patrick's Day? According to an article written by Michelle Gervais, the number three was always a mystical number to the Celtic religion. Since white clover (shamrocks) had three leaves, they became a sacred plant used by the Irish Druids. Enter St. Patrick. As he traveled Ireland spreading Christianity in the 5th century, St. Patrick used this sacred Celtic symbol to help introduce the doctrine of the Holy Trinity. 

Now once a year, we use his sacred day to turn our homes and selves (and beer) green. Woo-hoo! This fun child craft uses wine corks taped together as a stamp to make shamrocks. It's really that easy. First you need to drink three bottles of wine ;). Tape those corks together and dip them in green paint. Then let your child loose on a piece of paper. 


This was my daughter's first try at stamping. Check out her intense concentration while she figures it out. Eventually, stamping got a little mundane for my her taste. So I got out a brush and she quickly brushed over all her beautiful shamrocks. Oops! Oh well. Maybe this painting will end up in the trash rather than the fridge :).

Wednesday, March 2, 2016

St. Patrick's Day Sensory Box (Part 2) -- Baking Soda and Vinegar Play


This is Part 2 of my previous post, St. Patrick's Day Sensory Box (Part 1) -- Sifting for Leprechaun's Gold, where I placed gold coins, buttons, and rocks into a bin full of baking soda and let my 18-month-old explore and search for gold.

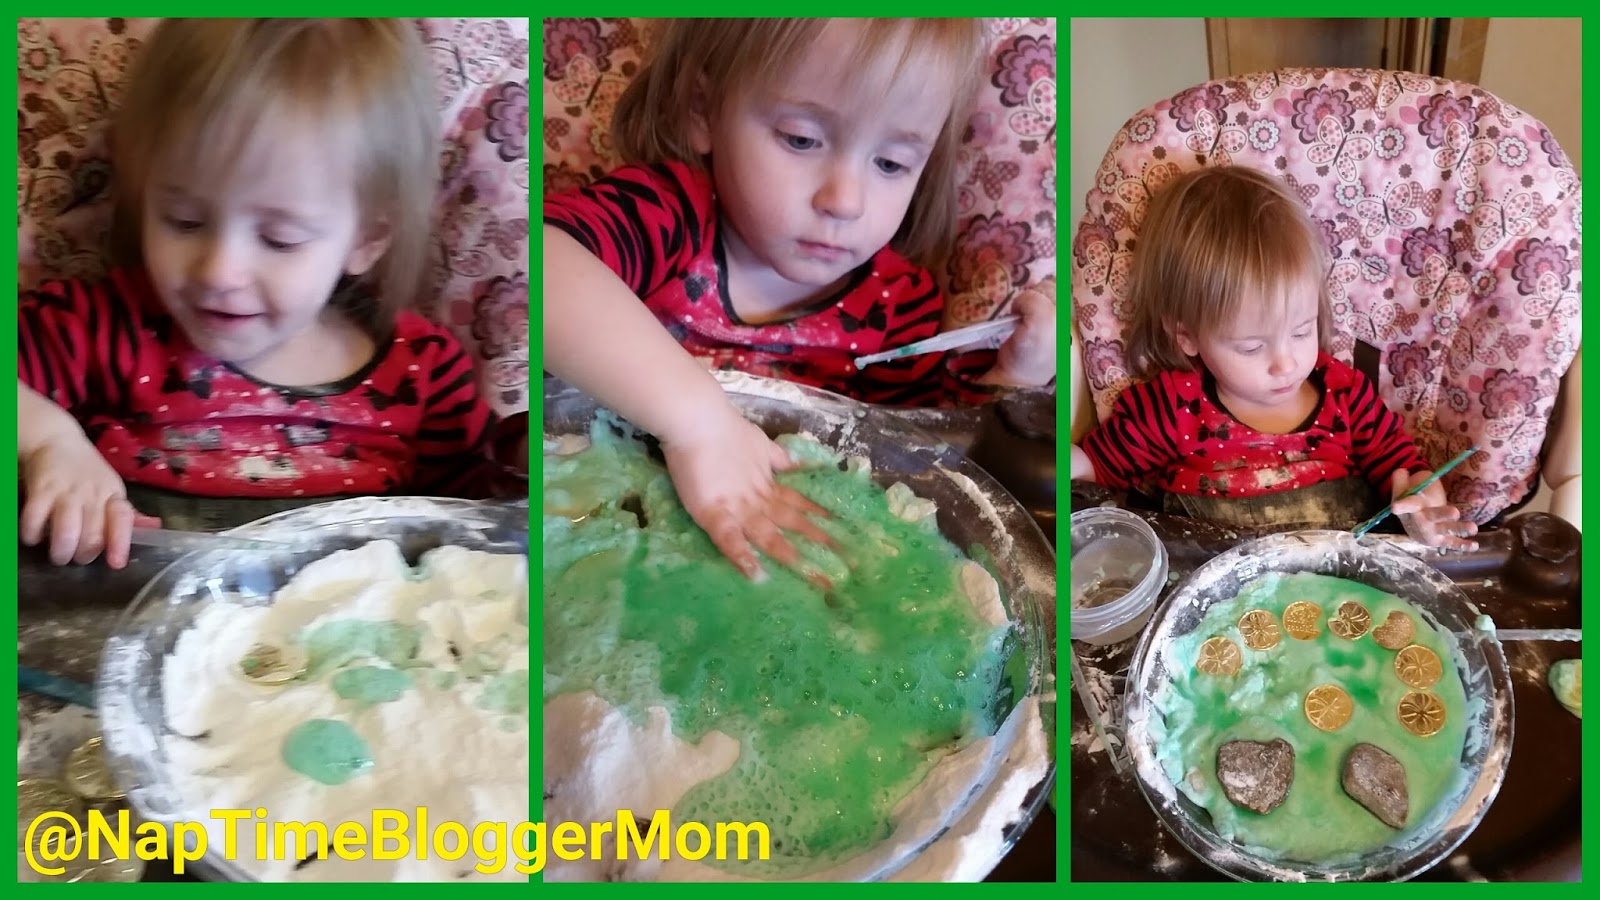
Now what the heck am I suppose to do with that box full of baking soda? Reuse it for another fun activity, of course! Pour some into a shallow dish; coins, buttons, and rocks all. Then give your little one a small container of vinegar colored green with some food coloring.

We used a small liquid dropper to add the vinegar. I like these because they only add a little bit of vinegar at a time instead of dumping it all at once (it stretches out play time). You could also think if using a spray bottle or have your older child practice spooning small amounts of vinegar. 

Anyways, before I even let Rose have the vinegar I let her play with the baking soda again. She immediately stuck her hands in and began searching for all of her gold coins, as you can see in the picture above. This is a great time to practice counting. We put the coins into piles of 3 (since we are just now learning to count, 3 is the highest we get to).

After all the coins were found and counted multiple times, I gave Rose the green-light for the green vinegar. As always, she had a blast watching the bubbles form and then playing in the mushy mess. Click here for a fun baking soda play dough (at the time, we used it as fake snow) that can then be used to later "melt" whatever you create. 


Once all the vinegar is used, why stop playing? We used our found gold to make a pretty face. As you can tell, Rose was not amused. 

Sunday, February 28, 2016

St. Patrick's Day Sensory Box (Part 1) -- Sifting for Leprechaun's Gold


Good morning! I'm really excited to share this one with everyone. I tried this fun sifting activity with my 1.5 year old a couple days ago. It was the first time I had introduced the process of sifting to her and she had a blast with it. Don't get me wrong... it took several (several, several) tries before she understood what the heck I was showing her. But, finally, she had fun trying the colander out for herself.

I prepared her sensory box during nap time, hence my blog's name Nap Time Blogger Mom.  I emptied a small tote out and filled it with baking soda. Why baking soda? No reason. You can use flour, corn meal, corn starch, etc. I used baking soda only because I know my daughter and I will reuse it in the future for some baking soda + vinegar play. Look out for Part 2 of my St. Patrick's Day Sensory Box where we add some green vinegar to our baking soda and watch the fun chemical reaction.


After the baking soda dust died down (there was much more than I was prepared for), I threw in a half a 30-pack of gold coins that I bought at the Dollar Tree. Then I wandered aimlessly around my house searching for other fun things to throw in. I ended up only finding a handful of buttons. For older kids, you can pretend-play that these are coal or other non-exciting finds. Then I ran outside and grabbed several rocks for her to have to play around. Lastly, I picked out the tools she would be using: a spoon, a small colander (from her play kitchen set), and some colorful popsicle sticks.

Now I just needed the kid. Once she was awake and ready, we sat down and she ran her hands through the baking soda. Much to her surprise she found the coins and buttons in there. I showed her the colander and explained how it worked while sifting and finding several coins/buttons myself. She enjoyed the shaking part , so be prepared for a mess (as always).


After one or two times, the sifting became too much of a chore and she used the popcicle sticks, spoon, and her hands to shovel her way through to her gold. If only finding real gold was this easy. :)


Friday, February 26, 2016

DIY Upgraded $1 Store Easter Magnets


I don't often go to the Dollar Store and now I remember why. They have a ton of awesome deals that I can never pass up because, come on, it's only $1! Well, right now they have these awesome Easter refrigerator magnets in stock. I bought one of each set: the Easter rabbit, and the 5 chicks.

As soon as we got home I opened up the package, popped them out of their forms, and stuck them on the fridge for my little one to begin playing with (why wait until Easter?). She was thrilled and immediately begin pulling them off and presenting them to me as if I had never seen them before in my life. She's pretty adorable.


While wondering if I could recycle the leftover magnet forms, it hit me (duh!) why don't I upcycle them myself?! I could cut them up and make extra (and educational) magnets for Rose. So that's exactly what I did.


I always have to remind myself not to get too fancy. Why put a lot of energy and time into something that my child will probably crumple up and ruin in seconds? So I didn't. I took some index cards and wrote out "purple", "blue", "pink", "green", and "pink" then cut them out. I cut out some funky shaped-magnets and hot-glued them to the back. In less then 5 minutes, I had made color magnets that corresponded to the 5 little chicks that I just bought. I also spelled Rose's name out and made each letter it's own magnet. Another plus, I still have 1 1/2 sheets of extra magnets left for future magnet-making.