Thursday, March 10, 2016

6 Super Fun (Easy Prep) St. Patrick's Day Inspired Toddler Activities


Over the past two or so weeks, my daughter and I have been trying and adapting some toddler activities that I have found on Pinterest. The six included in this list are the ones that we have deemed worthy enough to share with other parents looking for fun ideas to get their little ones (and themselves) into the St. Patty's mood. And here they are in no particular order:

#1: Shamrock Cork Stamp --
First off, you and your other adult friends and family need to drink 3 bottles of wine. Once done, tape those 3 corks together in the shape of a shamrock. Then simply give it to your child to dab in some green paint and stamp away making a lovely picture of mini shamrocks worthy of fridge-hanging.

#2: "Digging for Leprechaun's Gold" Sensory Bin --
This one will take minutes to put together. You will need a tub (or bowl), some cheap gold coins (I got mine from the Dollar Tree), and some type of medium to hide those coins in. I used baking soda so that my daughter and I could use it again for another activity, but you could use whatever you have laying around: beans, rice, flour (messy), birdseed, even good old dirt! Once you have your coins hidden in whatever medium you chose, let your little one dig for their coins. You can give them some tools to work with; like a spoon, colander, etc.

#3: Marbling Rolling Shamrock Painting --
I used 3 heart-shaped doilies for this one, but if you are fresh out of these you could always just cut out a shamrock shaped piece of paper. Anyways, you take your doilies or paper and tape it to the bottom of a cake pan, then drop some marbles in with some green paint, and finally place the lid on top. Hand this to your child and let them explore and roll the marbles back and forth while spreading the paint. Let dry and tape together to look like a shamrock. Hang, step back, and admire your child's creation.

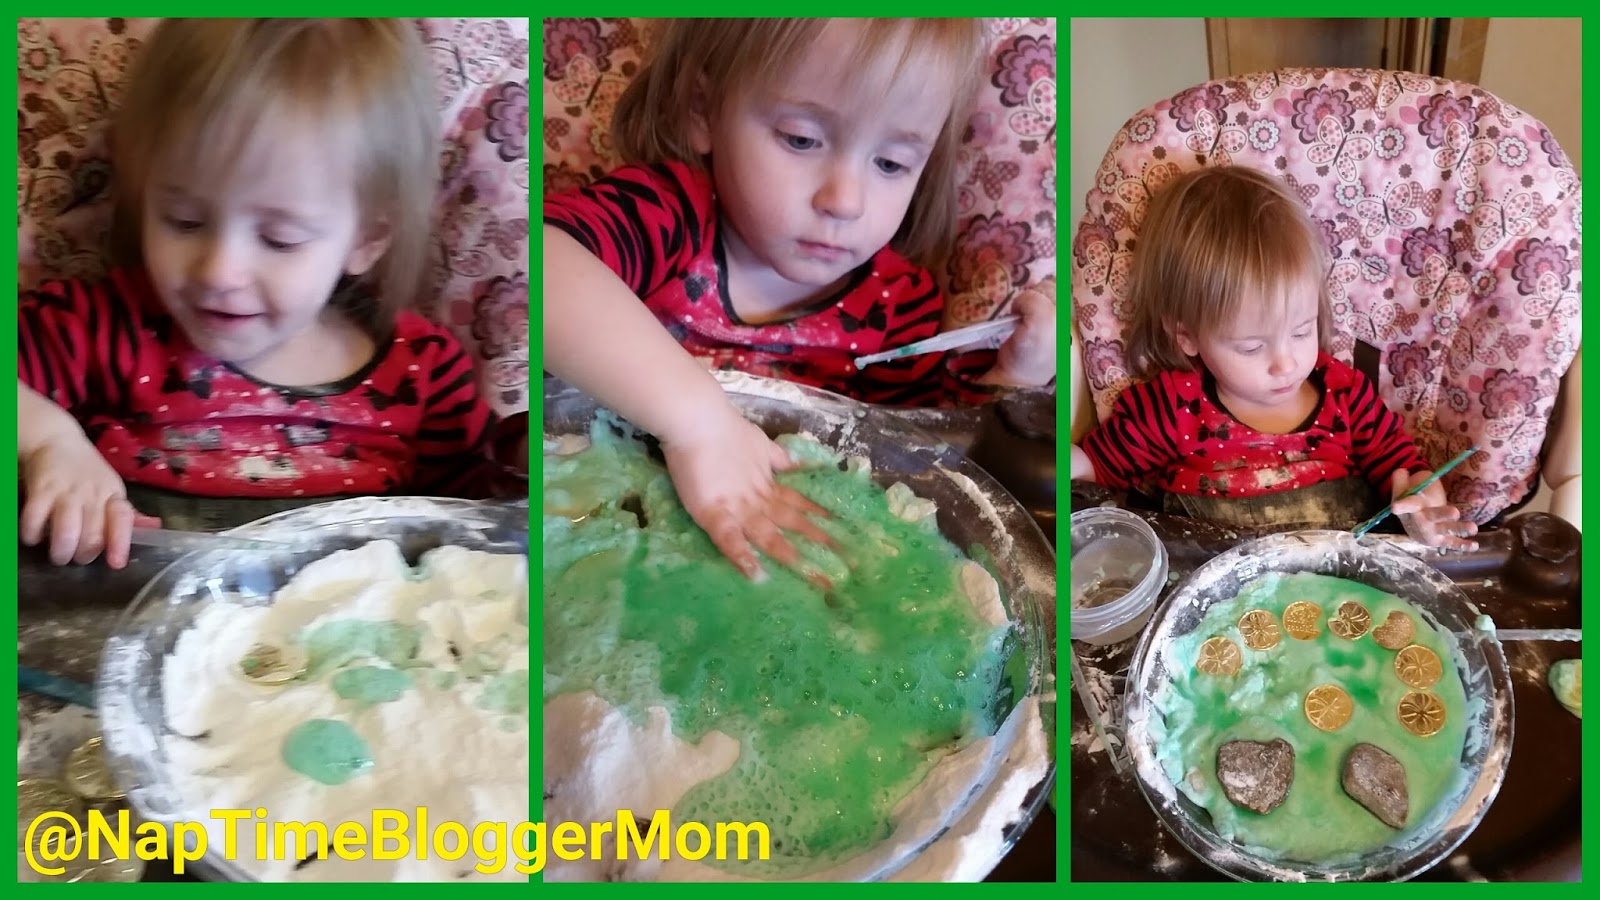
#4: Baking Soda and Vinegar Treasure Dig --
Remember that sensory bin from 2 paragraphs up? Remember that my daughter and I used baking soda? That's because we used some of the remaining baking soda in this activity. I transferred some of it to a shallow dish and let her play in it again while digging out all her gold coins. Once she got bored, I introduced some green vinegar and let her go crazy. She loves the bubbles and this is definitely one of our favorite activities!

#5: Rainbow Bath Puff Paint --
Another simple prep and you do not have to make it into a fancy rainbow shape like I did, because remember this is going to a toddler who doesn't care and who is going to mess it up in seconds. Mix food coloring with shaving cream. That's it. Then give it to your child in the tub to make a grand ol' mess. Clean up is easy since it's already in the tub.

#6: Shamrock Sun Catchers --
Tape some coffee filters to a hard surface and let your child color them with markers. After they are done, I taped them to a window and helped my daughter spray them with some water and we watched the colors blend. I then let them dry for a couple of hours before cutting them into the shape of a shamrock and hanging them in our front window.

I hope you enjoy some doing some of these activities with your children and making memories. Keep an eye out for our Easter activities that we will be doing within the next few weeks. Some are already up on the blog. Go ahead and add me on Instagram, @NapTimeBloggerMom, and you can see my daughter's and my daily adventures and maybe get some ideas for you and your family.

Friday, March 4, 2016

St. Patrick's Day Shamrock Cork Stamp


Why shamrocks? Why has this small, weedy plant become the face and main symbol of St. Patrick's Day? According to an article written by Michelle Gervais, the number three was always a mystical number to the Celtic religion. Since white clover (shamrocks) had three leaves, they became a sacred plant used by the Irish Druids. Enter St. Patrick. As he traveled Ireland spreading Christianity in the 5th century, St. Patrick used this sacred Celtic symbol to help introduce the doctrine of the Holy Trinity. 

Now once a year, we use his sacred day to turn our homes and selves (and beer) green. Woo-hoo! This fun child craft uses wine corks taped together as a stamp to make shamrocks. It's really that easy. First you need to drink three bottles of wine ;). Tape those corks together and dip them in green paint. Then let your child loose on a piece of paper. 


This was my daughter's first try at stamping. Check out her intense concentration while she figures it out. Eventually, stamping got a little mundane for my her taste. So I got out a brush and she quickly brushed over all her beautiful shamrocks. Oops! Oh well. Maybe this painting will end up in the trash rather than the fridge :).

St. Patrick's Day Shamrock Marble Painting


We've been on one heck of St. Patrick's Day binge! My last posts were a St. Patty's Day Sensory Bin and a St. Patty's Day Science Project, but now I need some little crafty something from my daughter to hang up for some green decorations for when the day finally is upon us. And here is what I settled on.

I have some leftover paper heart doilies from Valentine's Day that I had bought from the Dollar Store in February. I'm sure you could find some year round at a big craft store near the wedding or cake-baking area. Anyways, my idea is to take 3 hearts to make a clover and let my daughter finger paint them. Well...they are very deliate and tear easily, so I needed a way she couldn't get her little finger on the doilies. Enter, marble painting. I have always loved this idea on Pinterest, but have never put it into use. For our first try, it went fantastic.


It was the very first thing we did in the morning after breakfast (my little one wasn't even out of her pjs). Set up was a snap, literally only taking less than 3 minutes. I taped 3 doilies down on the bottom of a cake pan, speckled some green paint in there, and threw in 10 marbles.


Then I handed it to my daughter and showed her how the marbles moved when she shook it or tipped it. She did the rest.


Afterwards, I pulled up the doilies and set them to the side to dry. Once dry, I glued them down to a piece of paper and used a green popsicle stick as a stem. Now, I have an adorable marble-painted clover for my daughter's craft wall in the kitchen and I love it.

Wednesday, March 2, 2016

St. Patrick's Day Sensory Box (Part 2) -- Baking Soda and Vinegar Play


This is Part 2 of my previous post, St. Patrick's Day Sensory Box (Part 1) -- Sifting for Leprechaun's Gold, where I placed gold coins, buttons, and rocks into a bin full of baking soda and let my 18-month-old explore and search for gold.

Now what the heck am I suppose to do with that box full of baking soda? Reuse it for another fun activity, of course! Pour some into a shallow dish; coins, buttons, and rocks all. Then give your little one a small container of vinegar colored green with some food coloring.

We used a small liquid dropper to add the vinegar. I like these because they only add a little bit of vinegar at a time instead of dumping it all at once (it stretches out play time). You could also think if using a spray bottle or have your older child practice spooning small amounts of vinegar. 

Anyways, before I even let Rose have the vinegar I let her play with the baking soda again. She immediately stuck her hands in and began searching for all of her gold coins, as you can see in the picture above. This is a great time to practice counting. We put the coins into piles of 3 (since we are just now learning to count, 3 is the highest we get to).

After all the coins were found and counted multiple times, I gave Rose the green-light for the green vinegar. As always, she had a blast watching the bubbles form and then playing in the mushy mess. Click here for a fun baking soda play dough (at the time, we used it as fake snow) that can then be used to later "melt" whatever you create. 


Once all the vinegar is used, why stop playing? We used our found gold to make a pretty face. As you can tell, Rose was not amused. 

Sunday, February 28, 2016

St. Patrick's Day Sensory Box (Part 1) -- Sifting for Leprechaun's Gold


Good morning! I'm really excited to share this one with everyone. I tried this fun sifting activity with my 1.5 year old a couple days ago. It was the first time I had introduced the process of sifting to her and she had a blast with it. Don't get me wrong... it took several (several, several) tries before she understood what the heck I was showing her. But, finally, she had fun trying the colander out for herself.

I prepared her sensory box during nap time, hence my blog's name Nap Time Blogger Mom.  I emptied a small tote out and filled it with baking soda. Why baking soda? No reason. You can use flour, corn meal, corn starch, etc. I used baking soda only because I know my daughter and I will reuse it in the future for some baking soda + vinegar play. Look out for Part 2 of my St. Patrick's Day Sensory Box where we add some green vinegar to our baking soda and watch the fun chemical reaction.


After the baking soda dust died down (there was much more than I was prepared for), I threw in a half a 30-pack of gold coins that I bought at the Dollar Tree. Then I wandered aimlessly around my house searching for other fun things to throw in. I ended up only finding a handful of buttons. For older kids, you can pretend-play that these are coal or other non-exciting finds. Then I ran outside and grabbed several rocks for her to have to play around. Lastly, I picked out the tools she would be using: a spoon, a small colander (from her play kitchen set), and some colorful popsicle sticks.

Now I just needed the kid. Once she was awake and ready, we sat down and she ran her hands through the baking soda. Much to her surprise she found the coins and buttons in there. I showed her the colander and explained how it worked while sifting and finding several coins/buttons myself. She enjoyed the shaking part , so be prepared for a mess (as always).


After one or two times, the sifting became too much of a chore and she used the popcicle sticks, spoon, and her hands to shovel her way through to her gold. If only finding real gold was this easy. :)


Saturday, February 27, 2016

Rainbow Bath Paint


We can all agree that the longer days are a good thing, right? Especially, when it means that warmer temperatures are around the corner. But until then, a day at home with an 18-month-old can feel like forever. 

Yesterday, we desperately needed an activity that would help break up our day and last more than 10 minutes. In our house, bath time is always an thumbs-up choice for a 30 minute or more activity. To shake things up, I broke out the shaving cream and food coloring and made a not-so-cute rainbow. Why make it perfect when it's going to be messed up in seconds? 


Simply, mix some shaving cream and coloring in a separate bowls and carefully (or not so carefully) spread onto a smooth surface. I used a giant plastic lid that goes with one of my mixing bowls. 

It proved to be an excellent pre-bath activity. Since both the mess and messy child were already in the bath, clean-up was also fairly quick and easy. My little lady played with the shaving cream for a good 15 minutes before a long 20 minute bath. 


All in all, I can say this time-wasting activity was pretty successful. 

Friday, February 26, 2016

DIY Upgraded $1 Store Easter Magnets


I don't often go to the Dollar Store and now I remember why. They have a ton of awesome deals that I can never pass up because, come on, it's only $1! Well, right now they have these awesome Easter refrigerator magnets in stock. I bought one of each set: the Easter rabbit, and the 5 chicks.

As soon as we got home I opened up the package, popped them out of their forms, and stuck them on the fridge for my little one to begin playing with (why wait until Easter?). She was thrilled and immediately begin pulling them off and presenting them to me as if I had never seen them before in my life. She's pretty adorable.


While wondering if I could recycle the leftover magnet forms, it hit me (duh!) why don't I upcycle them myself?! I could cut them up and make extra (and educational) magnets for Rose. So that's exactly what I did.


I always have to remind myself not to get too fancy. Why put a lot of energy and time into something that my child will probably crumple up and ruin in seconds? So I didn't. I took some index cards and wrote out "purple", "blue", "pink", "green", and "pink" then cut them out. I cut out some funky shaped-magnets and hot-glued them to the back. In less then 5 minutes, I had made color magnets that corresponded to the 5 little chicks that I just bought. I also spelled Rose's name out and made each letter it's own magnet. Another plus, I still have 1 1/2 sheets of extra magnets left for future magnet-making.

Monday, February 22, 2016

"My Little Easter Egg" Craft

Rose got this adorable finger-puppet book from her Grandma and absolutely loves it. Since she is forcing me to get into the Easter mood so early, I decided to do a quick Easter egg craft with her this morning. I won't toot my own horn, but I didn't even get this idea from Pinterest and it turned out pretty good. Also, I love how quick it was to set up.
Simply stick some painters tape in fun designs on a piece of construction paper. Then let your child finger paint like normal on the paper. After he/she is done painting, carefully take the tape off and let the painting dry. Once dry, cut out an egg shape. There you have it. A refrigerator-quality Easter toddler craft.

Friday, February 19, 2016

Name Scavenger Hunt


Here's a fun and easy learning game to set up for your child during his/her naptime. Plus, it only take 10-15 minutes of prep time so that leaves the rest of little one's naptime for you to complete that never-ending list of chores.


Use some scrap paper and write your child's name over and over again. Then cut them out. Don't worry about them looking pretty. They're for your 18 month old and she won't care if all the angles are 90 degrees.


Then tape them up around the house where you child might see them. Once naptime is over, help your child find them around the house. Use a basket and prep for Easter hunts!

Talk about each letter and make funny noises for each. For example, when I point to the letter "R" I say "Ruh, ruh, ruh" loudly and enthusiastically and when I point to the "S" and run my finger over the curves of the "S" and hiss like a snake, etc. After making a fool of yourself, remember to finish up by saying their name slowly while pointing to each letter in turn and then repeating their name quickly. For "Rose", I have to explain that the "E" is silent. That's the English language for ya.


After all your letters and name cards have been collected you can keep them for another day. I keep some posted around the house so throughout our normal day we can stop and spell our name. It's the first step to learning the alphabet!

7 DIY Curtain Tie Backs

Several weeks ago my husband and I put up new curtains in our main floor living area. To make a long story short, we forgot to buy pull-backs for them. I did a quick Pinterest search and found some really cute DIY ideas and compiled them here:

1. Brass Clasp Pull Back -- find the DIY instructions here.
Photo/Idea Source: The Black Bird

2. Rope Curtain Tie Back -- this one looks like a lot of fun to make. Find step-by-step instructions here.
Photo/Idea Source: Cottage in the Oaks

3. Ribbon and Ring Tie Back -- Find this tie-back and more ways to add color to a room here.
Photo/Idea Source: Successful Home Makers

4. Fork Tie Back -- Get crafty with this unique fork tie back. Find how to and many more upcycled ideas here.
Photo/Idea Source: Country Living

5. Gold Chain Tie Back -- Go get that old dog chain you have been meaning to throw away and use it to make this classy and modern gold tie back. Find out how here.
Photo/Idea Source: HGTV

6. Door Knob Tie Back -- Find this rustic tie back and more upcycle ideas here.
Photo/Idea Source: Whisper Wood Cottage

7. Lace Tie Back -- Finally, this was my quick solution to our curtain problem. Find the super short DIY instructions here.
Photo/Source Idea: Nap Time Blogger Mom

Easy DIY Lace Pull-Backs

A couple of weekends ago, the husband and I decided that we needed to dress up our main floor windows. (You know... finally... after living here for 8 months). We went out to Lowe’s and bought some curtain rods and fell in love with some curtains there. 3 hours and $300 later we had them up in our living room, play room, and dining room. And, man, do they look awesome.

But, DANG IT, we forgot to get pull-backs so that they would hang pretty when we wanted some natural light. That’s alright. I ran up to my craft room and rummaged through some drawers and found some old lace I had used to make some DIY lace crowns for Rose once upon a time.  

I simply cut a length (about 13 inches for the once pictured) of lace. Then screwed a hook about 1 cm away from the trim on either side. Wa-la! It was literally that easy and now I don't have to go shopping.

Friday, February 12, 2016

List of Bunco Night Decorations and Recipes Ideas

My local MOMS group has a Bunco night once a month and this month it was my turn to host. As I do with most things, I got really excited and went crazy on Pinterest looking for Bunco or dice related recipes and decorations. There weren’t that many to be found and I had to sift through a lot of Bunco How-To’s to find some. So I thought I would quickly compile them into a list to share with everyone. Here’s what I found starting with decorations and ending with recipes:

Decorate with Dice – Fill any glass container with extra dice. I like the sunflowers in the picture and thought about doing pink tulips for my Valentine’s-themed Bunco night.

Photo/Idea Source: The Greenbacks Gal Blog

Dice Banner – How cute is this? All you need is some black paper, white paper, and some ribbon.
Source: Unknown.

Dice Toothpicks – Have some extra white and black paper left over from your dice banner? No worries. Use those leftovers to make adorable dice-topped toothpicks.
Photo/Idea Source: Stamp With Ann

Dice Tables – If you’re lucky enough to have 3 card tables that you use for your Bunco night, this idea is easy, quick, and fun! 
Photo/Idea Source: All Things Thrifty

Yard Dice – Make a set of these for your family to play with and to use for a quick decoration on Bunco night! Learn how here.
Photo/Idea Source: The Pinning Mama

Dice Shaped Money Jar -- Every bunco night needs a money jar. Why not spiff it up with some polka dots to make it look like a die? DIY instructions found here.
Photo/Idea Source: Sew Many Ways

Kleenex Box Dice -- Add a couple over-sized dice to your party decor. Hang them from the ceiling or stack them up on a side table. Learn how to make these simple dice out of Kleenex boxes here.
Photo/Idea Source: Fun Theme Party Ideas

Bunco Snack Mix – Here's my creation for the list. Click here for my own Cinnamon Sugar Bunco Snack Mix recipe!

Dice Crispy Treats – How cute are these? Simply make a pan of rice crispy treats, cut into cubes, and push chocolate chips into the sides. Boom done!
Photo/Idea Source: Beauty and the Stamper

Dice Cheese Ball – More like cheese cube. Ha. Learn how to make this adorable dish here or use your own favorite cheese ball recipe.
Photo/Idea Source: The Greenbacks Gal

Sugar Cube Dice CupcakesI love these. Add them to the top of some cupcakes or any other dessert to add some bunco cuteness to any treat. Click here to find the simple how-to. 
Photo/Idea Source: Every Day Donna

Oreo Truffle Dice -- Mmmm. My mouth waters just thinking about these. Find a yummy oreo truffle recipe here and dip the truffles into colored chocolate. Finally either use sprinkles or icing for the dots. 
Photo Source: Unknown